How to use System Restore in Windows 10

System Restore in Windows 8Picture this: you installed new software or, without realising, you’ve changed an important setting and your computer stopped working properly. You can either shake your fist angrily or push the reset button again and again hoping the problem will eventually be solved – or you can learn to use the System Restore tool.

Simply put, System Restore will let you revert to a point in time before things went wrong, called a restore point, and undo last changes to the system. It’s like a time machine, but only for computers.

This guide will teach you how to configure and use System Restore in Windows 8. Before you start, run a complete backup of your files and folders.


Restoring to a previous point

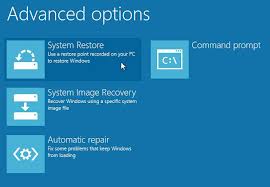
Hold down the Windows key and Q to open the search box or point the mouse to the top right corner of the screen and click on Search. In the search box type Recovery, click on the Advanced System Settings bar and choose the recovery icon from below and a new window will appear.

Select Open System Restore. By default, the tool will show you the most recent restore point. Let’s say the problem appeared after you’ve installed the printer and you’ll need to revert to a time before things went wrong. To restore to that point, all you have to do is click on Next and then Finish and the computer will restart your system and roll back. The tool also allows you to choose from different restore points.


Creating a restore point

As before, hold down the Windows key and Q to open the search box, type Recovery, click on the Settings bar and choose the Recovery icon from below. Select the Advanced System Settings then click on the System Protection tab.
This time, instead of choosing the System Restore option, select Create to manually set up a new restore point. Write down a description to help you identify the restore point, then click on Create. The date and the time will be added automatically.


The System Restore feature can be really helpful especially since, sometimes, programs can accidentally change settings that they shouldn’t have. System Restore will allow you to go back to a restore point and invert these settings.


Tweak your monitor for the best viewing experience

Tweak your monitor for the best viewing experienceIt goes without saying that you don’t have to be a graphic designer, a web developer or a professional photographer to care about the quality of your image. A proper monitor calibration will allow you to see images the way they were meant to be seen and improve the look of videos, photos and games.

Although getting the colors right can seem a bit confusing, the standard calibration process is fairly easy. Here’s how you can calibrate your display for the best viewing experience.


Things to check before calibration


Before you get started, make sure your monitor has be turned on for at least 30 minutes so it can get to its normal operating temperature. Then, if you use your display to another resolution, set it back to its native one.
Ambient light reflecting from the monitor’s face can lighten and wash out colors. For this reason, make sure you calibrate your monitor in a room with moderate light – not too bright, not too dim – and with no direct light hitting the screen.


Calibrate using built-in tools


The quickest and easiest way to calibrate your monitor is by using the built-in calibration tools. If you never calibrated your display before and worry you’ll get lost in the process, both Windows and OS X have built-in utilities which will help you and guide you step by step. Don’t get discouraged by the terminology, you don’t really need to make sense out of the jargon in order to calibrate your monitor.


Windows settings


Go to Control Panel, select Appearance and Personalization, click on Display and then select the Calibrate display color option.
A new window will open, featuring the Display Color Calibration tool. All you have to do know is to follow the instructions and choose your monitor’s gamma, brightness and contrast and color balance settings. For each setting you will be shown a sample image of what the ideal level should look like. Just try to match your setting with the sample.
Once you’re done, don’t forget to select the current calibration to make sure Windows will remember your new settings. If you are not satisfied with the result, return to the previous calibration and adjust some more.


Mac OS X


Go to Go to System Preferences, select the Display tab, click on the Color tab and then on the Calibrate button. The Display Calibrator Assistant will now open. Make sure to check the Expert Mode box, otherwise you will be able to access just the target gamma and white point settings.
Now, just follow the instructions to set you monitor’s brightness, contrast, target gamma, native gamma and target white point.
Once you have finished, click on Continue and save the calibration profile.


8 common problems with Windows 8 and how to fix them

8 common problems with Windows 8 and how to fix themSome complain about the confusing new interface, others say there are a number of bugs in the operating system. Either way, everybody agrees Microsoft’s newest operating system has its fair share of problems.

Fortunately, you don’t have to be a computer expert to fix these problems yourself. Here are some tips on how to fix 8 common problems with Windows 8.


The Start menu can’t be found

The problem: One of the most common problems with Windows 8 is that its new interface is utterly confusing. Designed to work on both traditional and touch screen devices, the problem with Microsoft’s newest OS is that, besides the desktop mode, which looks a lot like previous versions of Windows, it also features an “App-view”. Confusion awaits!

The solution: For those who want to resurrect the Start Menu, there are some Start menu replacements they can install. We recommend Start8, Start Menu8 or Start Menu Reviver.


Windows Explorer crashes frequently

The problem: A recurring problem with Windows 8 seems to be the constant crash of Windows Explorer. Users have reported that, after installing the OS’s newest version, Explorer has stopped working.

The solution: To fix this problem, you will have to use the Refresh my PC¬ tool. Go to Settings, click or tap on Change PC Setting then select the Update and Recovery tab. Open the Recovery bar and select Get Started and Refresh your PC without Affection your Files. Your Windows will now be reinstalled without deleting your files. As an extra precaution though, back up your data before completing this task.


The Blue Screen of Death

The problem: The Blue Screen of Death is usually accompanied by this message: “DRIVER_IRQL_NOT_LESS_OR_EQUAL”, basically telling you that Windows has crashed because of a problem with a driver.

The solution: In most cases, an additional text will be displayed along with the error message, giving you hints on what might cause the cause the problem. Even so, if you don’t catch the message, you can go to C:/Windows/Minidump and search for error dumps. Once you find the root of the problem, it’s easier to fix it.


Multiple copies of the same file

The problem: Every time you make a change to a file, Windows automatically makes a copy of it. The problem with this backup feature is that, sometimes, it can make copies of the same file even when no changes have been made to it, taking unnecessary space of your RAM.

The solution: Unfortunately, there doesn’t seem to be a widely accepted solution for this bug. Most experts say the best way to fix it is by disabling the default backup service.


Explorer.exe appears blank

The problem: Some users reported that, when they boot their computer, a blank window pop ups. It has the shape of the Explorer.exe file manager, but with no text and an OK button.

The solution: The cause of this problem seems to be a faulty Load value in your registry. To fix it, type regedit in the search box and open the Registry Editor. Click on the Windows registry tab and look for an entry labeled under the name of Load. Delete the entry and the problem should be fixed.


Unclear text

The problem: Some programs display a fuzzy or blurry text.

The solution: Most often, this problem appears with older software designed for displays with a lower resolution. To fix it, right-click on the program’s executable, go to Compatibility tab and the select the Disable display scaling on high DPI settings box.


Sleep mode not working

The problem: Windows 8 refuses to go to sleep.

The solution: In the search box type cmd, thus opening the Command Line. Then, type the command powercfg –devicequery wake_armed. Now, open Device Manager and go through each component, putting your computer to sleep after each, to see which one keeps your computer awake. To do so, double click on each component. A properties window will appear. Go to the Power Management tab and check the box next to Allow this device to wake this computer. This should help you find the perpetrator.